
Introduction
The latest software update to Blackboard Ultra includes:
- Upload questions from a file.
- Announcements in top-level navigation.
- Changes to how exemptions are handled.
- Ability to add course links.
This blog post will guide you through some of the new features and how to incorporate them into your teaching.
Upload questions from a file
This new update includes a new feature that allows module leaders to author questions offline using a simple text file. This capability allows instructors to upload the file directly into a test, greatly improving the test creation process. Each question file should be in tab-delimited TXT format. The file should include no more than 250 records to avoid time-out restrictions.
*NOTE For detailed instructions on formatting requirements, please refer to the dedicated Help page on the Anthology support platform for Blackboard Ultra.
Once uploaded, module leaders can edit and use these questions like any other test-created question. Using this approach saves instructors valuable time and effort, facilitating a more streamlined assessment process.
Support for uploading questions from the file is available for the following question types:
- Multiple choice / multiple answers
- True / False
- Essay
- Fill in the Blank
- Fill in Multiple Blanks
- Numeric response
- Matching
To upload a test file, the questions in the text file must conform to the guidelines in the following table.
*HINT Questions that contain an error will fail to upload. Questions without errors will upload successfully.
File format guidelines
Each file that contains questions to be uploaded must conform to these guidelines:
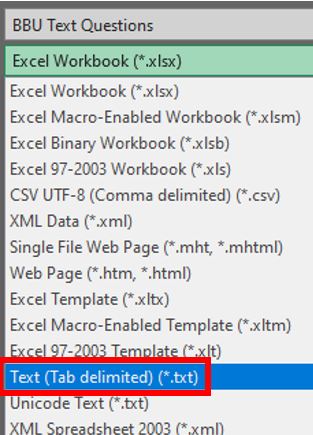
- Each file must be a tab-delimited TXT file. You can edit this file in Microsoft Excel or in a text editor.
- It is recommended that each file not exceed 250 records.
- Don’t include a header row in the file.
- Don’t include blank lines between records. The blank line will be processed and return an error.
- Include only one question per row.
- The first field in each row defines the type of question.
- Separate each field in a row with a TAB.
- Correct, incorrect, true, false, and other words that identify answers must be in English.
Question format guidelines
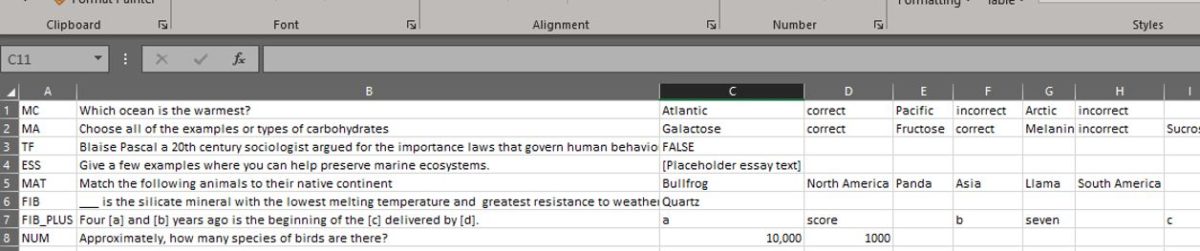
| Question Type | Correct Structure |
| Multiple Choice | MC TAB question text TAB answer text TAB correct|incorrect TAB answer two text TAB correct|incorrect
The maximum number of answers is 100. |
| Multiple Answer | MA TAB question text TAB answer text TAB correct|incorrect TAB answer two text TAB correct|incorrect
The maximum number of answers is 100. |
| True/False | TF TAB question text TAB true|false |
| Essay | ESS TAB question text TAB [example]
Text within [ ] is optional. You may choose to add a sample or leave this blank. |
| Matching | MAT TAB question text TAB answer text TAB matching text TAB answer two text TAB matching two text
The maximum number of answers is 100. The system will randomly order the answers and their question. When uploading a matching question, you must have a one-to-one relationship between questions and answers. If not, correct answers may be marked incorrect if more than one answer has the same value. |
| Fill in the Blank | FIB TAB question text TAB answer text TAB answer two text
The maximum number of answers is 100. |
| Fill in Multiple Blanks | FIB_PLUS TAB question text TAB variable1 TAB answer1 TAB answer2 TAB TAB variable2 TAB answer3
The format consists of a list of variable-answers where each variable-answer is composed of the variable name and a list of correct answers for that variable. Variable-answers are delimited by an empty field. The maximum number of variables is 10. |
| Numeric Response | NUM TAB question text TAB answer TAB [optional]tolerance |
You can download a sample question file here to review how the questions are formatted based on the above table.
Quick instructions
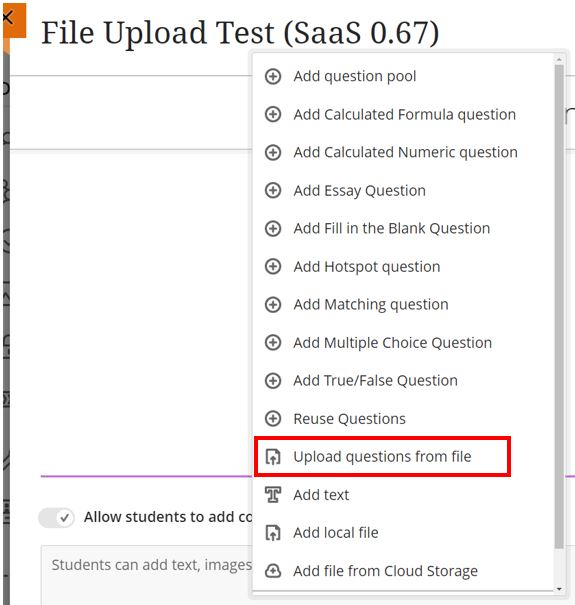
- From the test, select the plus sign to open the menu
- Select the Upload questions from file option.
- Select Browse to locate the file.
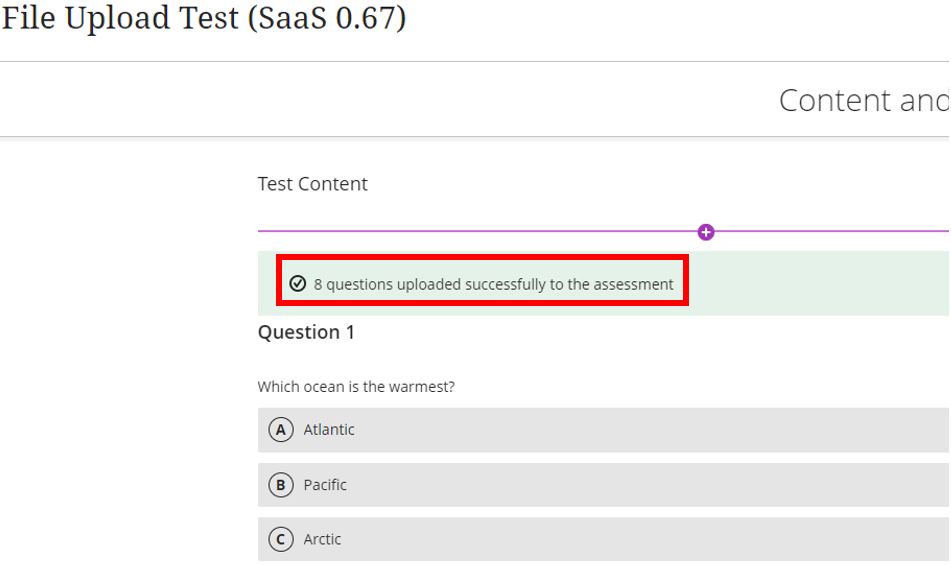
- Select Submit and OK. The questions appear in the test.
- You can edit and reorder the questions.
Detailed instructions
To use the new ‘Upload questions from a file’ feature, create a Test using the normal steps. When at the point of adding questions select the “Upload questions from a file” option.
*HINT A tab-delimited file can be created using a spreadsheet application such as Microsoft Excel to automate the formatting process as shown below.
You will need to save the spreadsheet document as a tab-delimited file type.
Navigate to the location the tab-delimited text file is located and click Open.
The import process will complete and will list the questions that have been imported successfully, and those that have failed.
Announcements in top-level navigation
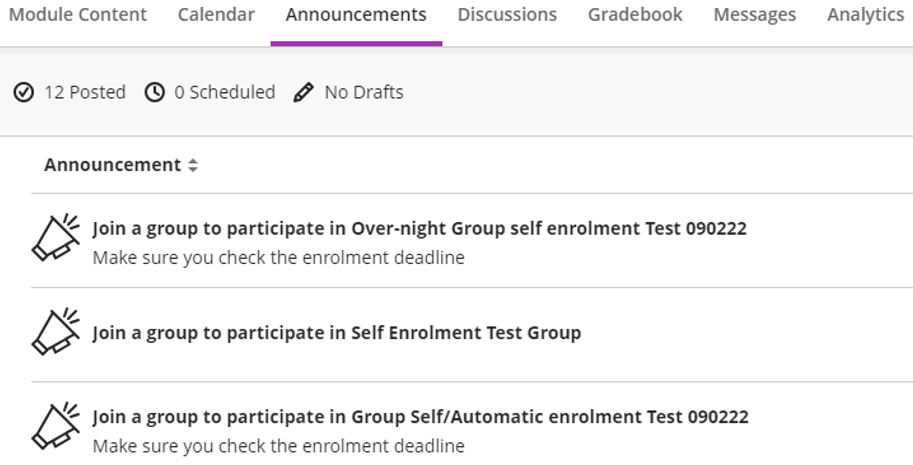
Announcements have been moved from the Details & Actions menu to the top navigation bar. This has been done to reduce the number of items within the Details & Actions menu and improve visibility and prominence of Announcements.
The screenshot below shows where to access announcements.
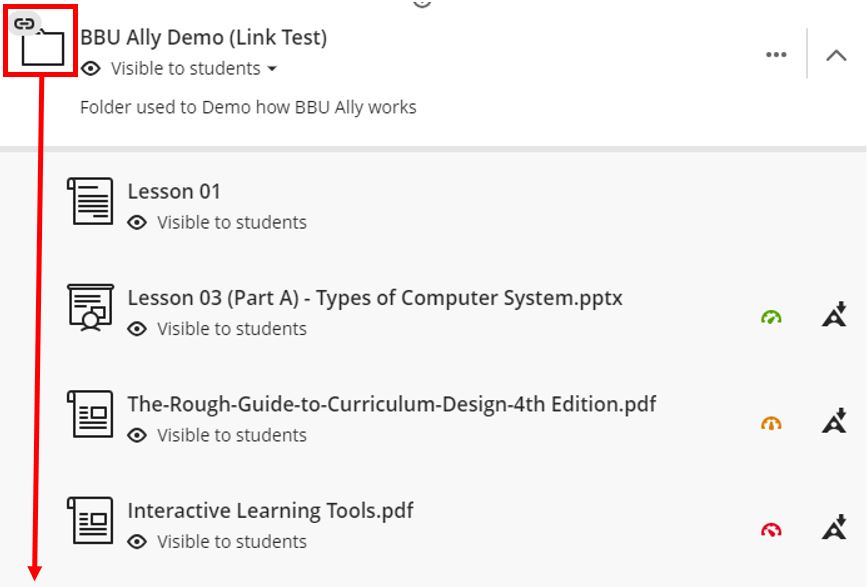
Course link improvements
A Course Links provides access to content without excessive scrolling and reduce clicking. For more information relating to Course Links and how to configure them please see the following article.
Course Links have been updated including:
- Course links now include Folders and Learning Modules.
- Introduction of new link iconography.
- Error messages when trying to copy/move links into locations that are not permitted.
- When searching for items to create links to, a preview also reveals the contents of the course link.
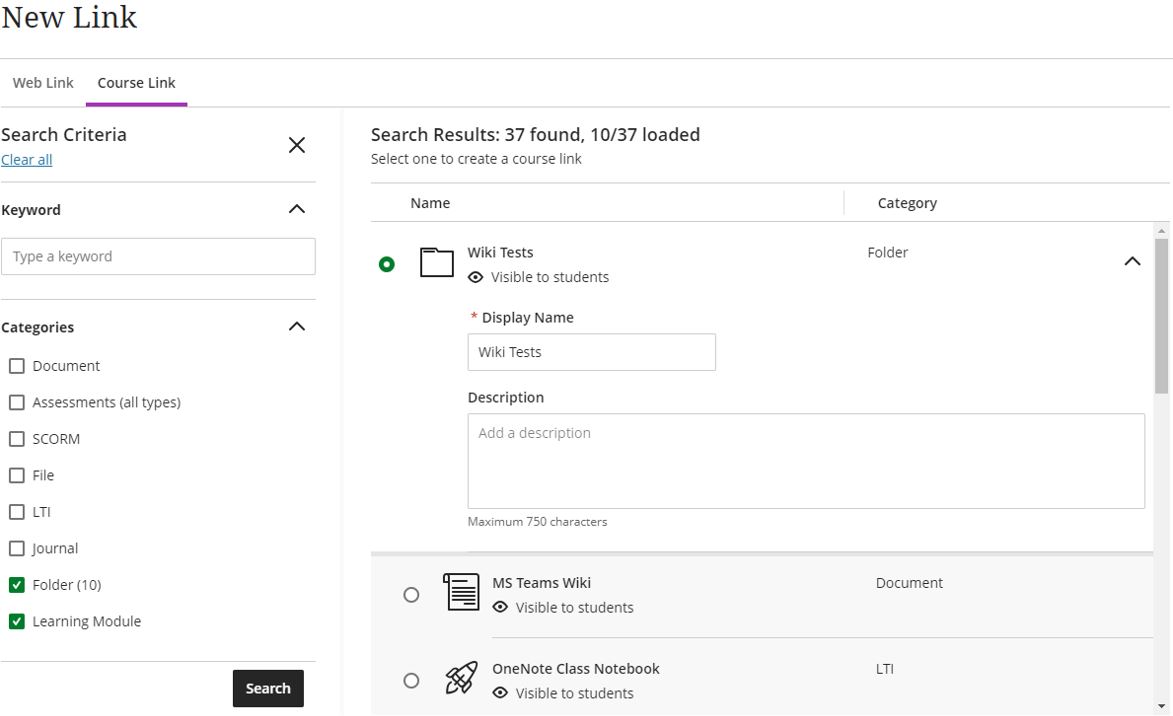
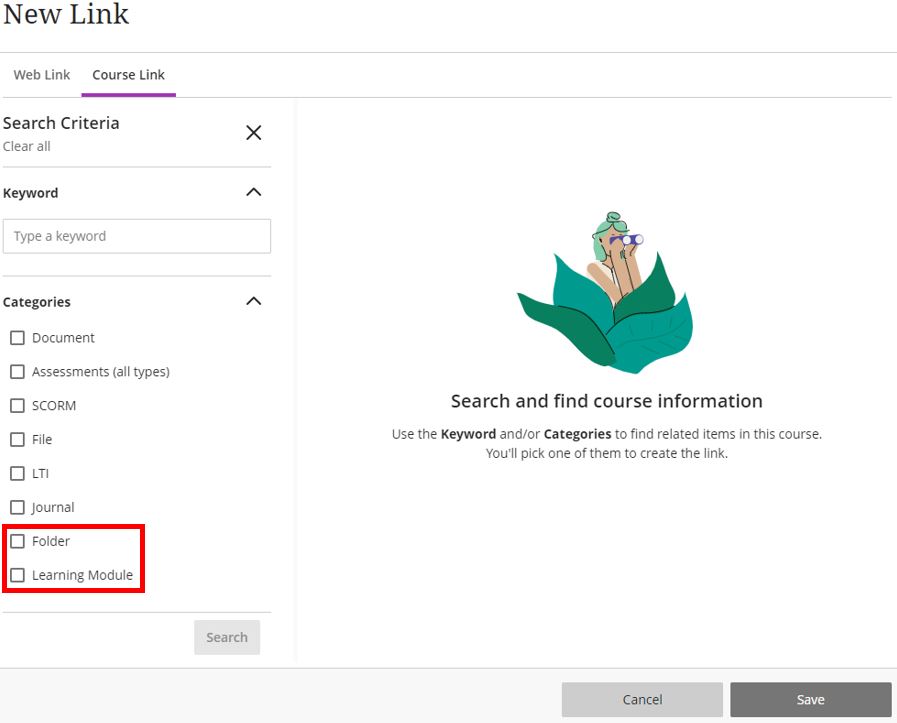
a. Course Links now include folders and/or learning modules from the Category section of Search Criteria. Additionally, these containers can be expanded in the search results to select an item it contains.
Quick instructions
- From the Module Content page select the plus sign to open the menu
- Select the Create option.
- Select Link.
- Select Course Link.
- Use Search Criteria, Keywords and Categories to locate content to generate links to.
- You can edit and reorder the questions.
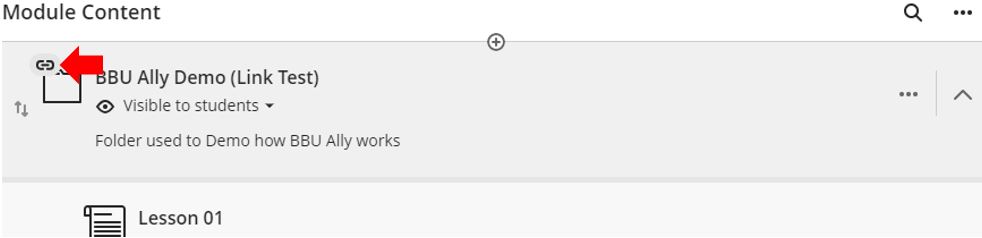
b. Addition of Learning module iconography on both Create Item panel and learning module (as shown in the background on the Course Content area).
c. Informing users that a link to a learning module cannot be moved into another learning Module. For example, creating a link to a Learning module called ‘BBU Tests’ and then trying to move it into another learning module called ‘Induction Content’ will generate the following error message.

d. When setting up a Learning Module or Folder link, as a user clicks on the link, this will reveal the contents of the course link in a read-only view.
Changes to how exemptions are handled
Exceptions allow adjustment to the number of submissions a student may make or the time a student can access a submission. Exemptions override some settings applied to everyone else for only that specific assessment. More information on exemptions and accommodations can be found here.
Module Leaders can grant an exception to a student for specific tests or assignments. These exceptions can include the following:
- Providing additional attempts.
- Rescheduling due dates.
- Granting extended access.
Previously, exceptions were only accessible from the submissions page for an assessment. Following the update, module leaders can access the exceptions workflow from the Gradebook grid view and Student Overview page.
The following enhancements have been added:
a. Add exemptions for anonymous assessment.
b. Add exemptions via
i. Gradebook
ii. Student Overview.
c. Support for anonymous test grading.
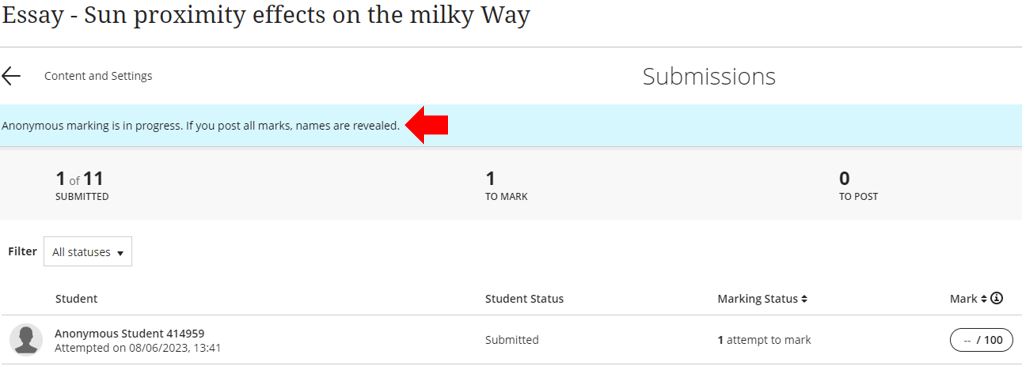
a. Anonymous Assessment
Anonymous grading helps to reduce grading bias. This update introduced a way for module leaders to set exemptions for anonymously graded assessments. The exemptions option for an anonymous assessment can now be accessed from the Student Overview page, this ensures a fair and accurate grading process for all students.

The exemption icon is not visible in the Gradebook grid view until all grades have been posted to help ensure student anonymity.
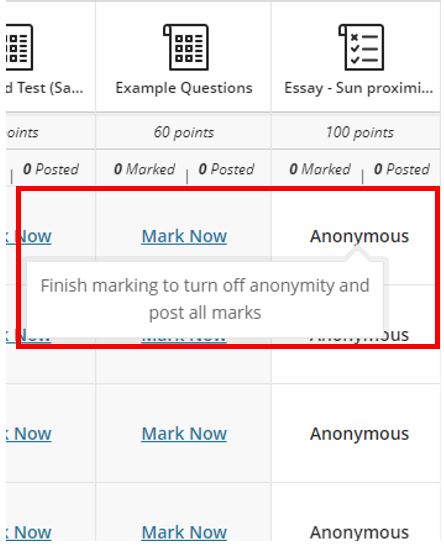
The exemption icon is not visible on an assessment submissions page until all grades have been posted; this helps to ensure student anonymity.
b. Add exemptions via Gradebook and Student Overview.
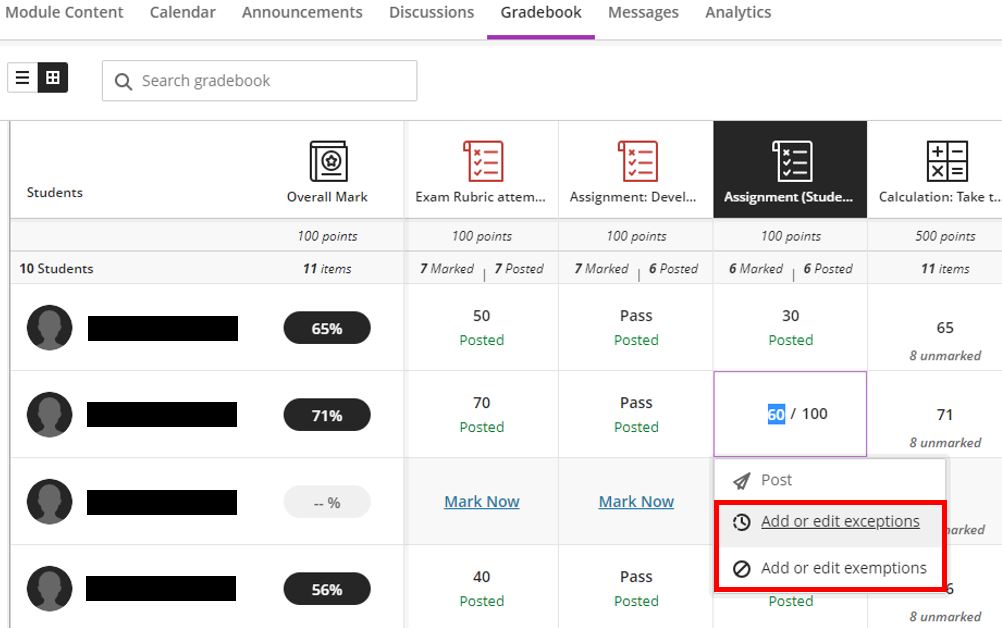
i. Add exemptions via Gradebook grid view.
To add or edit exemptions click on the cell in the gradebook results table and select Add or edit exceptions for either the Assessment due date or the Exempt from marking options.
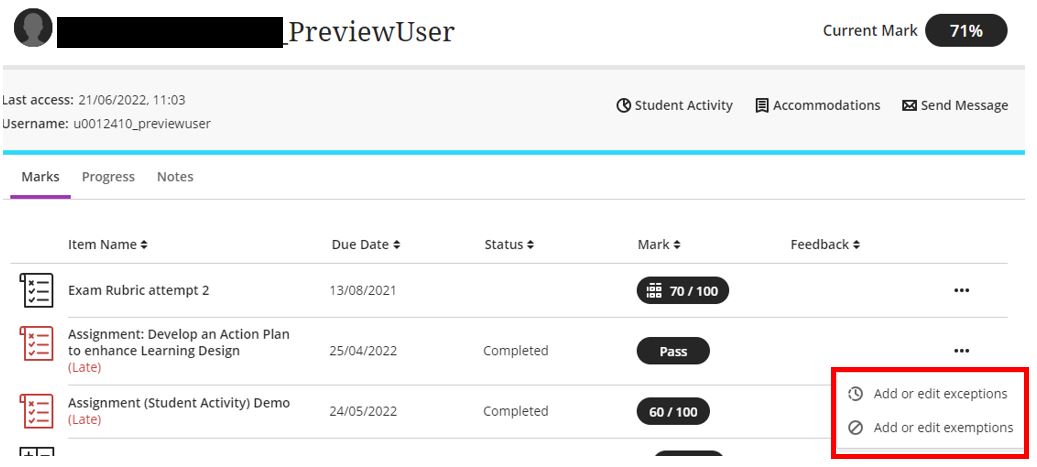
ii. Add or edit exceptions from the Student Overview page.
To add or edit exemptions click on the more options three dots to the right of the assessment in question whilst in the student view in Gradebook.
c. Anonymous grading of tests.
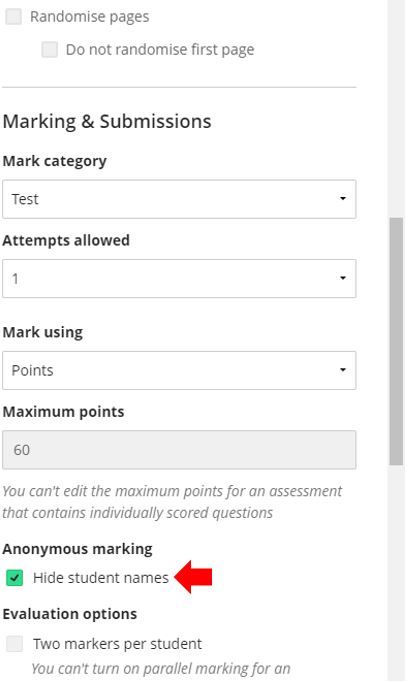
Module Leaders can reduce grading bias for tests by enabling anonymous grading, thus adding an additional layer of fairness and impartiality. Previously, this option was only available for assignments.
When creating tests, in Marking & Submissions settings, turn on “Hide student names” for anonymous grading in Test Settings.
Contact Us
If you would like to discuss any of the above in more detail, please don’t hesitate to contact the Digital Learning Specialists who are more than happy to arrange bespoke coaching and mentoring sessions. They are contactable at elearning@tees.ac.uk.