
Welcome to the first of this two-part blog series, in this first blog, we will introduce some of the latest software updates to Blackboard including:
This blog post will guide you through some of the new features, why they have been introduced, how they can benefit a module and how to incorporate them into your teaching.
Add Learning Module Image
Learning Modules provide a way to organise and structure content. Blackboard has introduced the option to add images to Learning Modules.
Adding an image to a Learning Module can:
- Fosters engagement and connection: Images establish a meaningful connection between the module content and students, making learning more captivating and the module material more relatable and appealing to students.
- Improves module visibility: Adding images boosts the visibility of Learning Modules, ensuring students easily spot and access the material they need and encourages them to explore the content further.
- Visual cues for content: Images act as visual descriptions, giving students an overview of the content’s nature and enhancing comprehension.
- Enhanced retention of knowledge and understanding: Relevant images reinforce learning, aiding in memory retention and deepening students’ understanding of complex topics.”
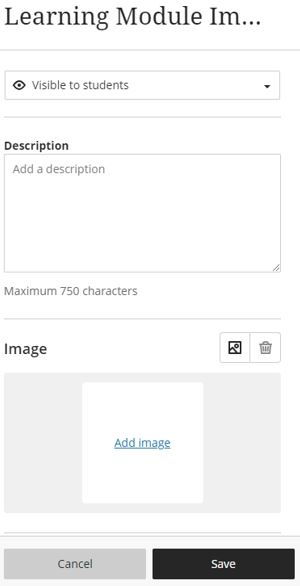
1. Adding an image to a new Learning Module
To add an image to a new Learning Module, module leaders will now see the ‘Image’ feature when creating a new Learning Module as shown in the screenshot below.
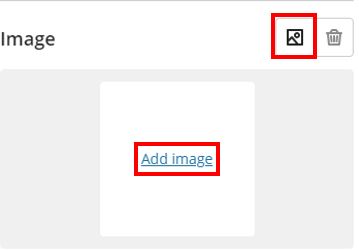
Images can be added to a Learning Module in multiple ways, this includes:
 |
 |
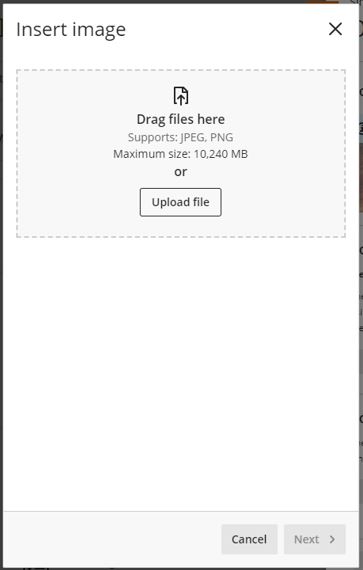
| Click the ‘Add image’ link or ‘Image’ button to open the ‘Insert image’ menu, from here images can either be dragged and dropped or uploaded via the ‘Upload file’ button. Once uploaded click ‘Next’ | From the ‘Insert image’ menu you can either add the image by dragging and dropping or uploaded via the ‘Upload file’ button. Once uploaded click ‘Next’ |
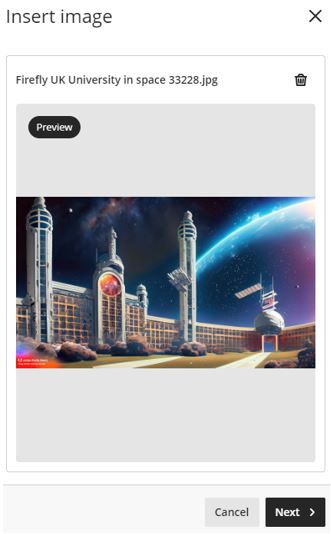
Once the image to be used has been selected it will appear in the preview, this allows changes to be made to ensure that the final image is represented as desired.
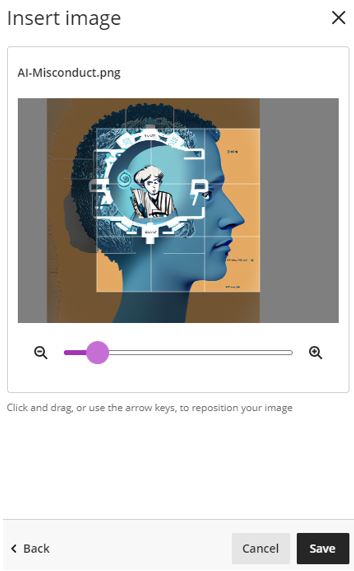
Once configure as required, click the ‘Save’ button to finalise the configuration and create the new Learning Module.
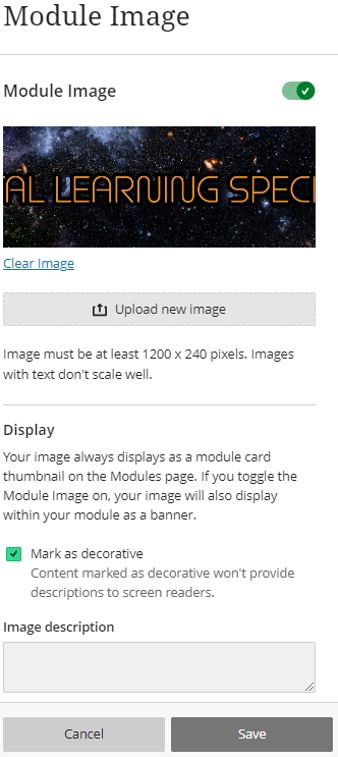
*Note Remember that from an accessibility point of view, you should add an ALT tag that allows people with visual impairments to have the image described to them using screen reading technology. If the image is simply decorative then tick the ‘Mark image as decorative’ tick box option.
2. Adding an image to an existing Learning Module
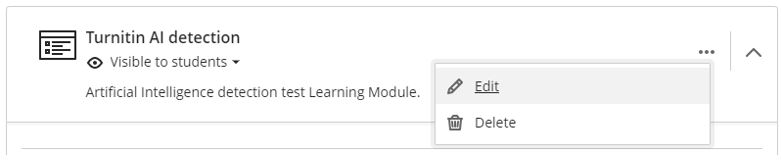
To add an image to an existing Learning Module, Module Leaders need to edit the module by selecting Edit from the Learning Module more options (ellipsis) menu.
Then follow the instructions from point 01.
Module Banner image improvements
A Module Banner is an image added to the top of your module homepage. The module banner image provides a sense of identity for the module, the use of the Module Banner offers many additional benefits including:
- Communication and Information: Module Leaders can use the banner to communicate essential information, such as the module title, Module Leader’s name, and contact details. This ensures that students have quick access to relevant information within the module.
- Visual Appeal: A module banner adds visual appeal to the module, making it more attractive and engaging for students. It creates a welcoming first impression, setting a positive tone for the learning experience.
- Branding and Identity: The banner allows Module Leaders to personalise their module by incorporating branding, module logos and other relevant images. This helps create a consistent identity for the module, reinforcing its association with Teesside University and School.
- Clear module Identification: When a student is a member of many modules in Blackboard, a distinctive module banner helps students easily identify and differentiate one module from another. This clarity can reduce confusion and enhance the overall navigation experience.
- Enhanced Instructor Presence: The module banner allows Module Leaders to make their presence felt. It adds a personal touch, making students feel more connected to them.
Blackboard has improved the image setting workflow. Please see the screenshots below to review the update in the user interface.
 |
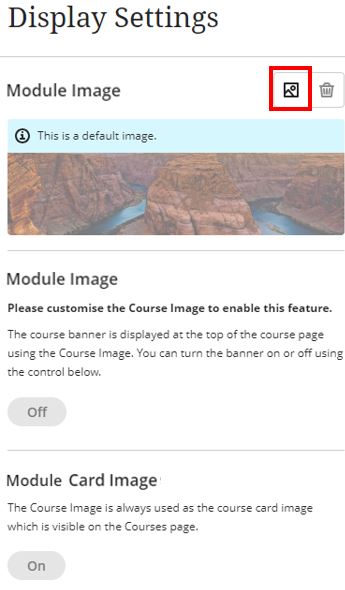 |
| The Module Image panel is renamed, and the default module image is now clearly marked as such. | |
To add a module image, select the Image button then select the image source by using the drag and drop or select ‘Upload file” features.
 |
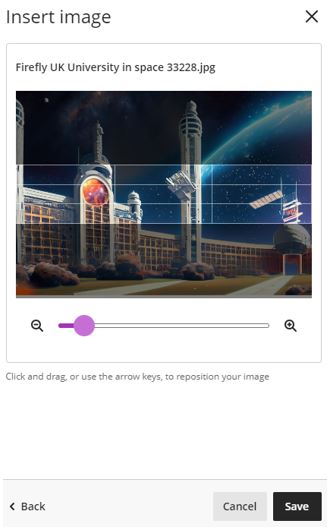 |
| The image appears in preview which helps the module leader to ensure that the desired image is selected. Click ‘Next’ to advance to the next image configuration screen. | The image can also be repositioned and zoomed in on to select the image’s focal point. Click ‘Save’ to complete the addition of a module banner. |
*Note regarding accessibility: ALT tags serve as descriptions that enable individuals with visual impairments to understand the content of the images through screen reading technology. If the image is simply decorative then tick the ‘Mark the image as decorative’ tick box option. Also, ensure that the colours and contrast used adhere to accessibility guidelines, making the module content more inclusive for all students.
Once complete the module banner will look something like this.

Contact Us
If you would like to discuss any of the above in more detail, please don’t hesitate to contact the Digital Learning Specialists who are more than happy to arrange bespoke coaching and mentoring sessions. They are contactable at elearning@tees.ac.uk.