
Introduction
Adobe Express continues to expand, allowing even greater creativity and flexibility, all through a web-based interface. This blog post focuses on one feature that we have been asked for many times – the ability to record yourself directly within Express.
Previously, if you wanted to add a video of yourself, you would need to record this prior to using Express. Once you had the video on your device, you could then import the video and use it as required. Now, Adobe Express has incorporated the ability to record yourself seamlessly whilst creating your digital artifacts, quickly and easily.
As with other video elements in Express, once recorded, you can edit your video. For example, remove any background images, change the video dimensions, adjust the colour, and even add an animation to the video.
Please note: At the time of writing this blog post, the Record Yourself option is available when creating an Adobe Express “Document” – for example, a poster, flyer or infographic, with a maximum length of 5 minutes per video.
This short video will take you through the process if you prefer to watch:
The Recording Workflow
To get started, try these steps:
- Access Adobe Express: https://new.express.adobe.com/
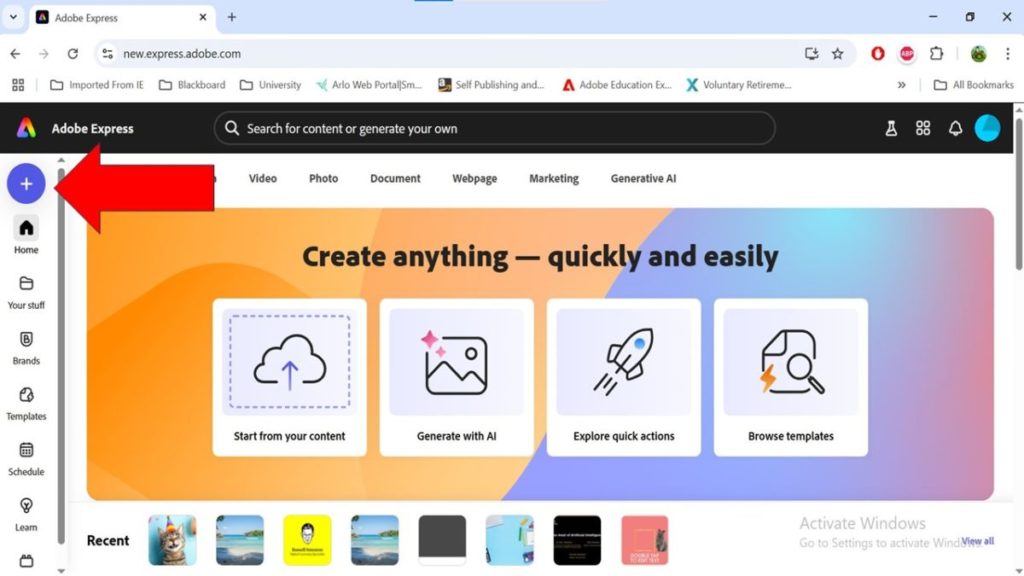
- Begin by creating your desired artifact in the usual way. For example, as in the diagram below, you can start by clicking on the plus icon in the top left of the screen, select Document and then choose the appropriate size.
- Now, develop your document as usual, adding images, text and so on.
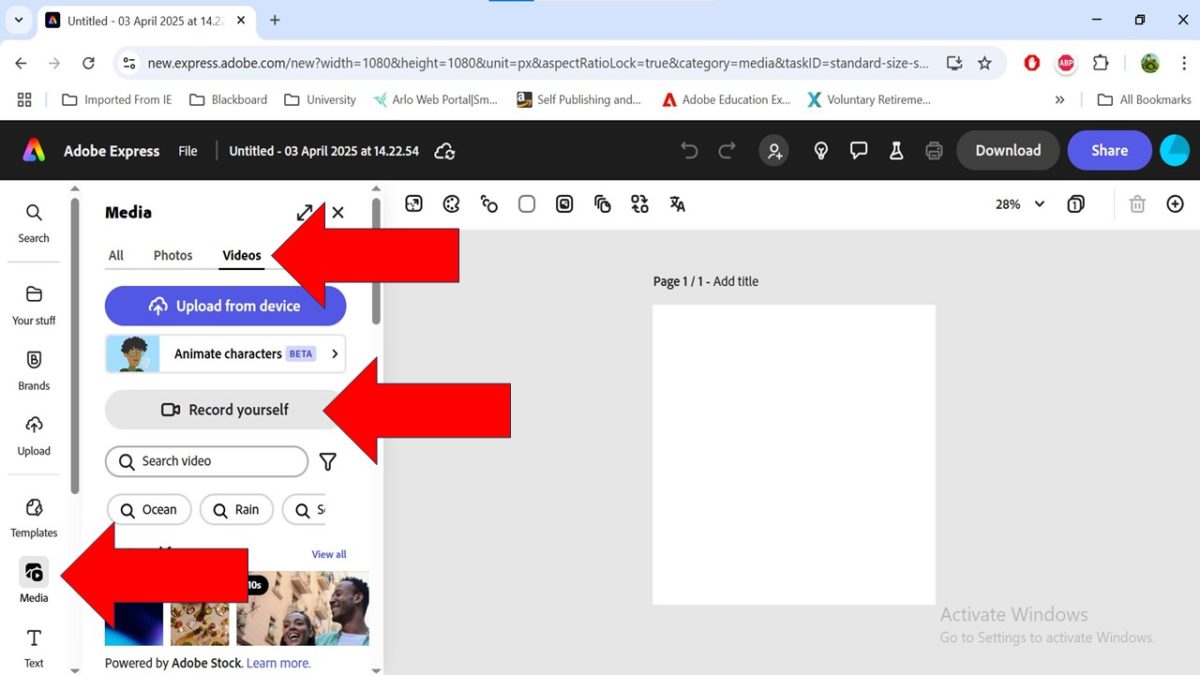
- When you want to Record Yourself, select Media from the left hand ribbon, and then choose Video.
- You should see the option to Record Yourself. Select this option.
The diagram below shows the three steps: Media, Video, Record Yourself

- When you are ready to being, click the Start Recording button. Don’t worry about the position of the video at this stage as you can adjust this later.
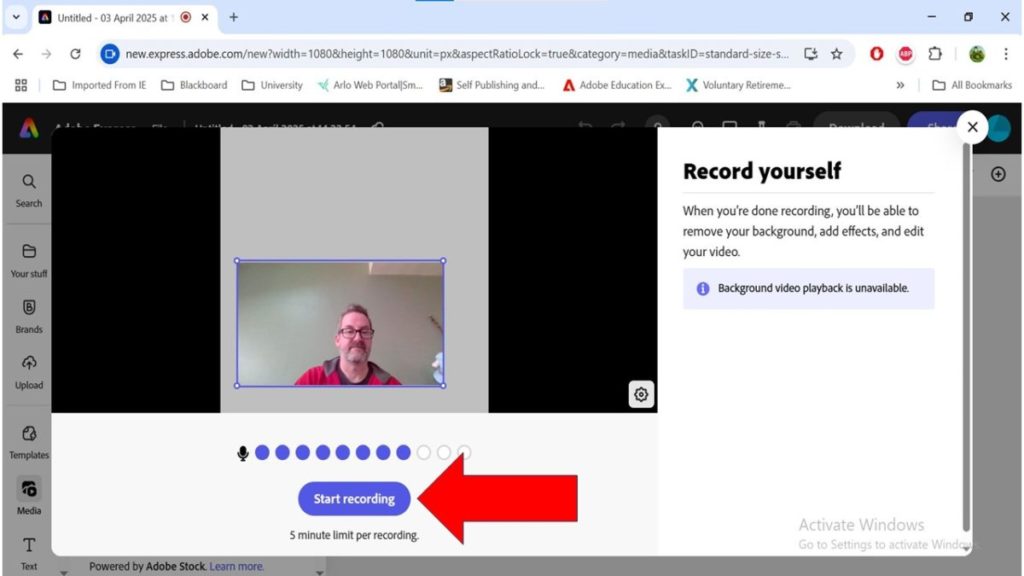
- You will get a 3 second countdown, and then the recording will start.
- Click Stop Recording when finished, and if you are happy with this, click Save Recording.
- You can now adjust the size of the video according to your needs.


Video Editing Options
When you have recorded your video, you will automatically be in the “video panel”. If not, click once on your video – you will get the resize handles appear on the video when it is selected. When the video is selected, you will see the Video context menu appear to the left of the screen.

- By default, you will currently be in the Edit section (as indicated in the image above):
- Remove Background will attempt to remove what is behind you in the video. The success of this will depend on things like lighting, clothes etc.
- Fill Video will resize the video so it takes up the entire size of the document.
- You can adjust the Volume and Speed of the video.
- Adjust will let you make fine adjustments to the lighting of your video.
- Corners will allow you to change your video into a more rounded video, even making it into a circle if you wish.
- Position allows you to automatically place the video according to the existing document.
- Opacity allows you to adjust how visible your video is, allowing you to blend the video in if required.
- Next to Edit, you also have the option for Effects, allowing you to change the look and appearance of your video colour. Selecting Effects will allow you to change the “tone” of your video, perhaps to make it match the document you are working on.
- Finally, you have the Animation options. This controls how your video appears and so on.
- In – the appearance of the video into the document.
- Loop – animation effects of the video whilst it is in the document.
- Out – control how the video leaves the document.
Adobe Creative Campus Newsletter
To stay up-to-date with the latest news, tips, and resources, subscribing to the monthly Adobe Creative Campus newsletter is highly recommended. This newsletter is packed with valuable information to help educators make the most of Adobe’s offerings in educational settings. Click to subscribe
By leveraging these resources, educators and students can unlock new potential and drive innovation in higher education.
If you have any queries about any of the resources on offer or would like additional support for staff please contact adobehelp@tees.ac.uk