
Stay ahead with the latest updates in Adobe Express!
We’re excited to share with you the recent functionality updates and enhancements to Adobe Express, designed to make your creative projects more powerful and intuitive than ever. These new features will help you streamline your work, enhance your teaching materials, and elevate student engagement.
Due to the length of this update, we have split it into sections that can be accessed via the ‘Contents menu‘ below. Following each section there is a ‘Back to top‘ link that will return the reader to the top of the page.
** It should be noted that Adobe Express has concentrated on updates to the presentation tool, including the ability to import a pre-existing PowerPoint presentation, adding animations and transitions and a powerful presenter mode. These three updates are covered first in this blog post.
Contents Menu
The following updates are included in this blog post
- Add transitions to presentation slides
- Import & convert a PowerPoint
- Deliver presentations using Presenter Mode
- Restricted lock settings and content control in Templates
- Favourite templates and assets
- Apply your brand in a single click
- Use reference images in Text to Image
- Adding charts
- Share a webpage as a remixable link
- Contact Us
Read on to discover how these updates can benefit you in the upcoming academic year!
Add transitions to presentation slides

Move your audience seamlessly between the slides in your presentation with engaging transitions such as Slide, Wipe, Dissolve, and more.
With slide page transitions, you can seamlessly transition between presentation slides in fun and engaging ways. Open your presentation in Adobe Express. To add transitions between your slides, complete these steps:
- Select a slide, then select the (more options) three dots icon.
- Select Add transition.
- In the Transitions panel, choose the Visibility and Move options.
*NOTE: Select Apply to all pages to add the transition effect between all the slides.
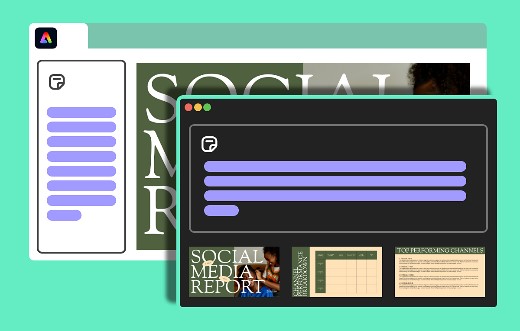
Import a PowerPoint
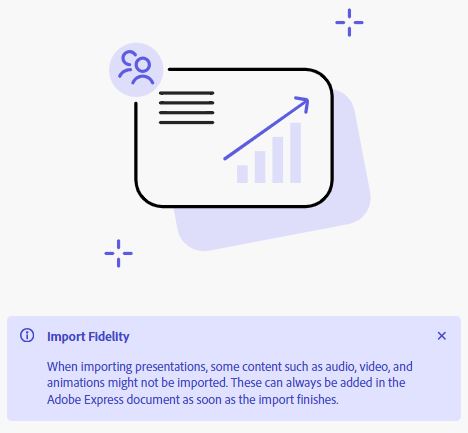
It is now possible to import a previously created PowerPoint presentation into Adobe Express and customise it in Express by adding text, images, animations, and more. The import process is simple but be aware that Adobe Express can sometimes struggle
- Click the Large ‘Plus (+)’ button located in the upper right of the Adobe Home page and the Upload your content option.
- Use the Explorer window to locate the PowerPoint file.
- Select Open in the import window to open the presentation in the Adobe Express editor (Adobe Express will now attempt to convert the PowerPoint into an Express-friendly format).
Result
The imported presentation opens in the Adobe Express editor. The file is automatically converted and saved as an Adobe Express file in Your stuff.
Deliver presentations using Presenter Mode
Take your Adobe Express presentations to the next level with presenter mode! With a dual-screen setup, you can view notes and pages simultaneously in presenter mode.
- Customise your presentation, manage the pages, and have it ready for presenting.
- In the toolbar, select Present.
- Select Present from first page, Present from current page, or select Presenter mode if you’d like to access your notes.
*NOTE For more information on creating and delivering presentations in Adobe Express see the Teesside University learning support guide: Adobe Express: Creating a Presentation.
Restricted lock settings and content control in Templates
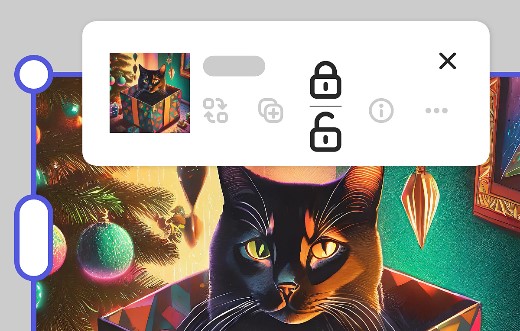
Create a controlled and focused editing experience to keep your content consistent. Enforce lock restrictions to prevent users from unlocking any locked assets in the templates you want to share. This feature is available only to Teams and Enterprise users.
Learn how to lock and unlock elements in your designs and apply brand-style controls to the templates you want to share.
Favourite templates and assets

Favourite any template, Adobe Stock photos, videos, design assets, and more, and access them easily in any design.
- Hover over a template, Adobe Stock photo or video, design asset, or background.
- Select the Favorite icon (the heart icon shown in the image above).
Once clicked, the template or asset has now been saved as in your Favorites collection. You can add as many templates and assets to your Favorites as you wish.
*NOTE To access your Favorites collection from Home or the Editor, select Your Stuff > Favorites.
Learn how to ‘save your favourite templates and assets, remove favourited templates and assets and add your favourite templates and assets to design’.
Apply your brand in a single click
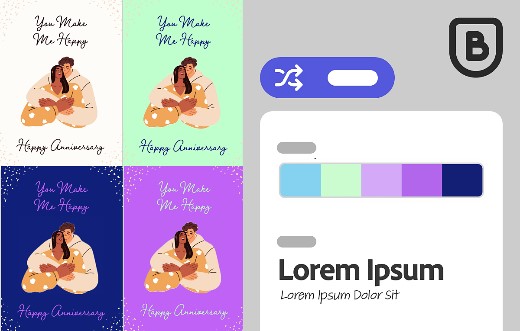
Quickly and easily apply your brand colours and fonts to your design and achieve a consistent look and feel in a fraction of the time.
- Open a file in the editor.
- In the left panel, select Brands and then select the brand you want to use.
- Select Apply brand.
Learn how to apply your brand colours and fonts to designs.
*TIP Review the best practices to apply brand colors and fonts effectively.
Use reference images in Text to Image

Guide the design of generated images by providing style and composition reference images. Style influences the look and feel of your generated image, and composition influences the depth and layout of your generated image.
- On the Adobe Express homepage, select Generative AI.
- In the ‘Text to image’ section, type what you want to create in detail, and then select Generate.
- In the Text to Image panel, within the ‘Reference images’ section, select the + icon to add a Style and/or Composition reference image from your device.
- Choose a Content type and apply Styles from the options provided.
- Select Generate.
- Choose an image from the Results or select Load More to see additional options.
- Select Download.
*NOTE Style influences the look and feel of your generated image and Composition influences the layout or arrangement of your generated image.
Learn how to create images using generative AI in Adobe.
Adding charts

More charts are here! Tell an impactful story with data by adding new bar charts to your designs and translating numbers into a compelling and clear message.
Add beautifully designed charts into presentations, infographics, documents, and more to showcase your data clearly and concisely.
*NOTE For more information on creating and using charts in Adobe Express see the Teesside University learning support guide: Adobe Express: Creating Charts
Share webpage remixable link

Share remixable webpage links for others to easily customise. In the Share panel, select ‘Save as a remixable template’. There are two remixable options available:
- Adding to a Brand/Library: This allows the people you have shared the template with to always have access to the most up-to-date version of the template. It also means that others will have access to the template alongside their styles, graphics and logos. It is also possible to add notes to the template to give tips and guidance on how best to use the template as well as limit the ability for other users to change aspects of the template.
- Publishing a link: This will publish a public shareable link, it is possible to control whether others have permission to remix the template and if the original author’s name is included in the template.
Contact Us.
If you would like to discuss or require additional support for any of the above please contact the Digital Learning Specialists, who can provide coaching and mentoring sessions.
They are contactable at adobehelp@tees.ac.uk