
The ‘did you know?’ series of blogposts will cover some of the most popular queries we receive about Blackboard Ultra. We begin the series with creating assignments.
Assignments in Blackboard Ultra can be created in their own container or alongside existing content. Any assignment that is created will be visible via the Gradebook automatically.
How to create an assignment
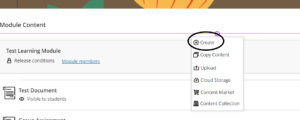
- Click on the plus icon where you would like the assignment to appear.
- Select Create.
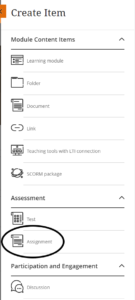
- Select Assignment to open up the assignment window.
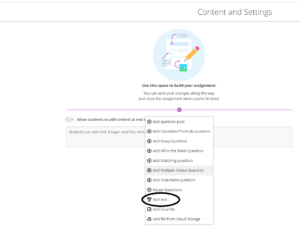
- Give the assignment a title and add some text to describe the task and to support students further. You can also add files into this area.
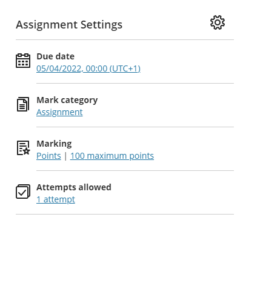
- Select Settings and choose a due date. Due dates will appear on the calendar and in the activity stream.
Other Options
- Accommodations – accommodations can be set for students to make them exempt from certain requirements such as the due date or any time limits set.
- Conversations – you can allow conversations within assignments to allow students to discuss the assignment in a discussion board-like area.
- Collect submissions offline – if your students are submitting an assignment that cannot be submitted online, such as a presentation or a piece of artwork, offline submissions can be selected in the settings area. This creates a column in the gradebook for the assignment but does not allow students to submit any files.
More information on creating assignments can be found in the Blackboard self study section in Organisations on Blackboard Ultra, or via the help guides on the Blackboard website.
If you require any further help, please contact eLearning@tees.ac.uk
Did you know? – Creating an Assignment in Blackboard Ultra