
Microsoft Outlook 2013 has some very nice new features but one that I’ve been finding very useful is the inclusion of a screen grab facility. There have been many times when I’ve needed to be able to send a screen shot of what I’m doing. In the past it’s been achievable using the keyboard and the Print Screen button. Then Windows introduced the Snipping Tool which was relatively quick and painless but you still had to save the image somewhere and then insert it.
Now Outlook has the option to insert a screen shot almost instantly.
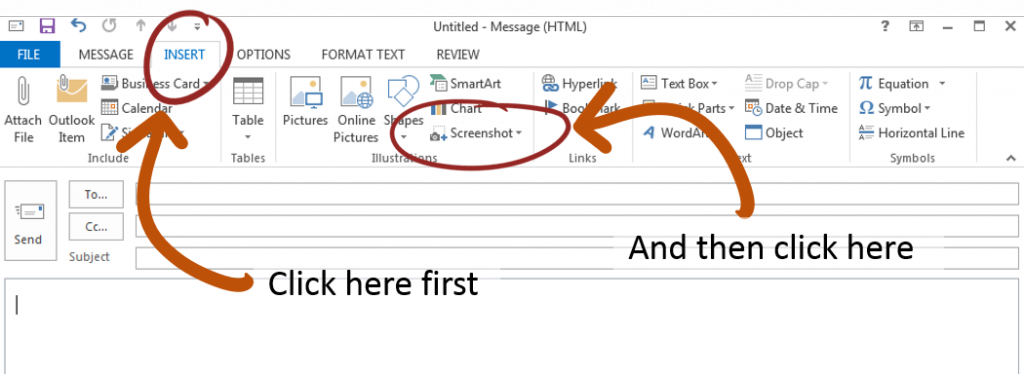
If you compose a new email, click on the Insert tab at the top of your email message box.Under Insert, there’s a section called Illustrations and in this section you should be able to see the option to add a Screenshot. Click on the word Screenshot and you’ll be presented with all available screenshots as thumbnails. Click on the thumbnail you want. Hey presto! You should now see an image of your screen in your message box.
You also have the option to capture just a section of the screen. Underneath the thumbnails there’s the option for screen clipping. Just make sure the screen image you want to grab is visible before clicking this option. When you click on it, the screen will become grayed out and you can highlight a portion of the screen. When you finish, the highlighted portion will be inserted into your email body.
Whichever method you use to get a screen grab it is essentially a picture. You now have all the tools you would normally associate with images – things like cropping the image, resizing the image and so on.
Hopefully this will be useful especially if you want to show exactly what is happening on your screen!