
Module banners are now available in Blackboard Ultra! These banners can give your modules a bit of colour and make individual modules rapidly identifiable.
You will need to upload a single image, and Blackboard will use the same picture as both the ‘module card’ image on the Modules page as well as the banner picture across the top of your module. For this reason, please don’t upload the same banners that were used on old Blackboard into Blackboard Ultra. One aim of the images is to make your individual modules readily identifiable on the Modules page, therefore, all images need to be different. Secondly, Blackboard will arbitrarily crop and resize your image for different screen sizes, which means any text on them may not function correctly on some screens.
It is best not to include any text on your banner image.
To add a banner to your module, use the following instructions:
- Click into your module.
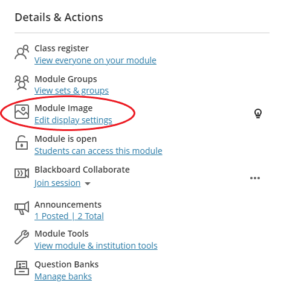
- Select ‘Edit Display Settings’ under ‘Module Image’ in the Details & Actions section.
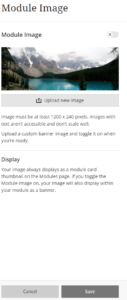
- Upload your image and click ‘Save’. You will see that an image needs to be at least 1200 by 240 pixels so that it works on all screen sizes. Bigger images are fine, Blackboard will just cut them down.
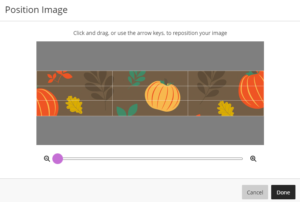
- You will then be asked to identify the centre of your image using a moving grid overlaid on your image. This allows Blackboard to make more intelligent choices about how to crop your image for different screen sizes.
If you would like to know how to create your own banner using Adobe Spark, click on the help guide below:
Design a Banner in Adobe Spark
If you need any further help with this, please contact eLearning@tees.ac.uk