
I started off trying to find an app that would allow me to record my iPad screen as a video. On a PC and presumably on a Mac, there are loads of alternatives. My own personal favourite is the free and easy ScreenR website. However, for the iPad it’s not so easy. So as I searched, I kept on being directed to apps that allow you to create screen casts. Not exactly what I wanted, but interesting none the less. What follows is a review of six free apps that I found.
Before I begin, it worth noting that most of the following require you to register the product. This then enables you to save/share/use whatever it is you have created. I’ve found that since registering I’ve not been spammed with any odd emails but that might change in the future. Another point worth noting is that most of these apps let you import pictures and you may find it useful to be able to use a screen shot of whatever it is you are doing on your iPad. To take a screen shot on your iPad, simply hold down the Home button and then press the Power button. You’ll hear a camera clicking sound and your screen shot will be available in your Photos.
Summary of Apps covered
I have decided not to rate these apps. I think most of them have something to offer, depending on what you are looking for. The best I can do is give you a quick summary before the full review and hopefully you can find something that fits your needs. My favourite at the moment is PageSend. The fact that it gives me the video directly is a huge bonus as I’m still a bit wary of “the cloud”. This may well change in time, but that’s the one I think I may be using in the future.

ShowMe works on a one page principal for you to explain your topic. It lets you import images, record a narrative and draw at the same time. The finished product is hosted on their server but it does allow embedding. This could then be posted inside your module if you wanted.

In theory, you are given one page but this is actually the size of 3 pages which can be scrolled to show/hide information to explain the topic. You can import images and it has the additional feature of being able to import PDF’s from DropBox. 3 pens can be used at once. The finished product can be posted on Facebook or sent to their repository.

More like a PowerPoint presentation, you can set up slides. You can draw and also use a simple text editor to type. Images can be imported from various sources, including DropBox. Finished article can be posted on Facebook and Twitter as well as hosted on their repository.
The most basic screen recording tool of those reviewed. No importing of images allowed, very basic features and ad supported. However you can save the finished product as a movie file for later editing if you wish – quite possibly the one redeeming feature of this app.

Similar to PowerPoint, this very powerful app is possibly the best of the bunch. It allows you to import from different sources as all as uploading Office documents. You can draw or type on your slides. The finished product can be sent to Facebook and Twitter as well as hosted on their repository. You can also save the movie onto your iPad.

Maybe I am trying to use this app for something it’s not designed to do but I found this to be “unfinished”. The interface was clunky and counter-intuitive. Despite some nice touches, this is possibly one to leave for now until they sort out their interface.
ShowMe
ShowMe works on a “one page” concept. You can draw in seven different colours but you can’t change the colours that you are provided with. You also cannot adjust the pen thickness. When drawing, I noticed a small time lag but this wasn’t anything too serious. Once you have drawn on the board, there is an erasure which allows you to remove anything that you don’t like/need. Like the pen, there’s no way of adjusting the size of this erasure. There is also an undo button to remove the last actions.
Pictures can be imported on the board from a variety of sources. You can use photos or images that you have saved on your Camera Roll. You can also take a photo there and then. In addition, you can search the web. There are no controls over how you search – you can’t say where you want to search from (e.g. Flickr or Google) but it works quickly and easily. A nice feature is that images can be layered – you can move an image backwards or forwards, just like in PowerPoint allowing you a high degree of flexibility. Images can also be rotated at 90% increments. By pinching, images can be quickly and easily resized. Any changes to pictures are not recorded – just the final size and position are recorded.
Drawings appear on top of any imported pictures. The erasure tool only works on drawings, not images. There’s an option to clear either all drawings or everything on the board.
There’s a nice simple recording button. Press it once and recording starts. A counter appears at the bottom, letting you know how much time you’ve taken. Press it again to pause. If you add a picture during recording, the screen cast will automatically be paused. You can pause recording giving you time to adjust the layout of the board.
Once finished, there are a few different ways to share the screen cast but all take you to the showme.com website. Upon accessing the website, there is the option to get the embed code for the screen cast. This is very useful if you are wanting to put just the screen cast into Blackboard.
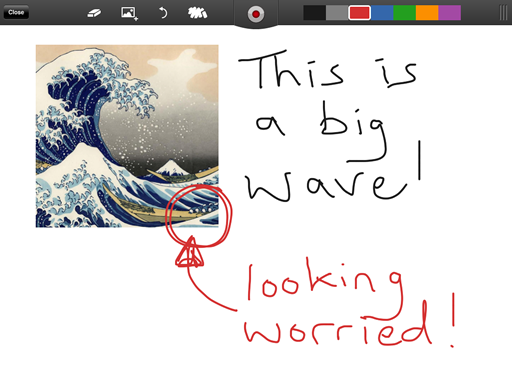
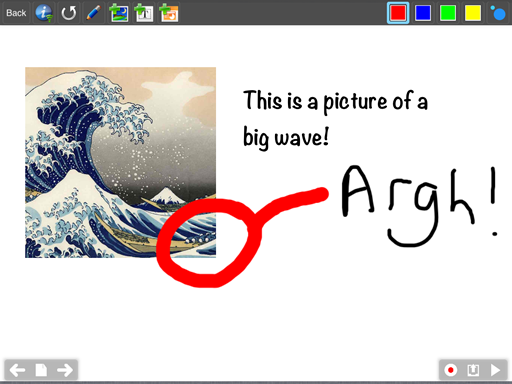
ScreenChomp
Like ShowMe, ScreenChomp works on a one page concept. Unlike ShowMe, your page is actually about 3 sizes the size of the board allowing you to scroll up and down. By pressing two fingers on the screen, you can scroll up or down the page. Not being overly skilled with iPads, I found myself not pressing the two fingers at exactly the same time and ended up inadvertently drawing on the page.
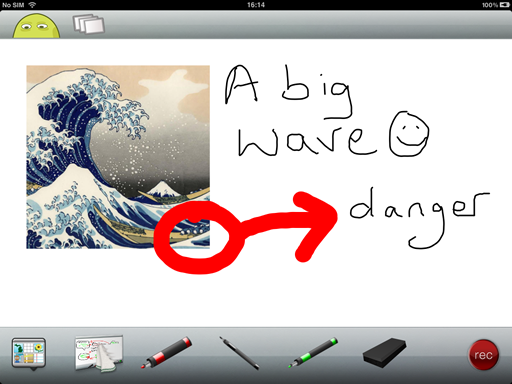
ScreenChomp allows you to import existing images, take photos and also import items from a Drop Box account. From Drop Box, you can import images and also PDF’s. This has potential for giving quick and easy feedback of student work, but the limitation is you can only really give feedback one page at a time. This might well be very time consuming. It would appear you would have to import the PDF, select the page you wished to demonstrate, record your feedback, pause the feedback, import the same PDF, select the next page and so on. Another point to note is that you can only resize
Drawing is very customisable. You can set up three different pens, allowing you to switch between them whilst recording. You can adjust the thickness (three different weights) and colours (12 to choose from) for the 3 pens.
Deleting drawings can be done using the “board rubber” tool, allowing you to rub out drawings you don’t like/need. There is one undo option, and that is to undo everything you’ve drawn on the screen. The animation that accompanies this action is well done but you have to hold your finger on the “wipe” icon for a few seconds for it to work.
Recording is done with a single button, allowing you to pause and continue your presentation.
Once finished, you are shown a preview of your video. After you have previewed it, you can send it to the ScreenChomp repository or post it on Facebook. This is where it all fell down for me. Try as I might, I could not get my video onto either Facebook or their own hosting. I can only assume it’s because they are providing a good, free app and so traffic might be very happy. However, that doesn’t really help me getting my video out there.
Educreations
Educreations differs from the above in that it allows you to create slides, similar to PowerPoint. You can draw in four different colours, each of which can be selected from 10 different colours. There’s no adjustment for the thickness of your pen. Once a drawing has been done, you can’t move it and there’s no erasure. However, there is an undo (and redo) option and there’s an option to clear all drawings from a slide.
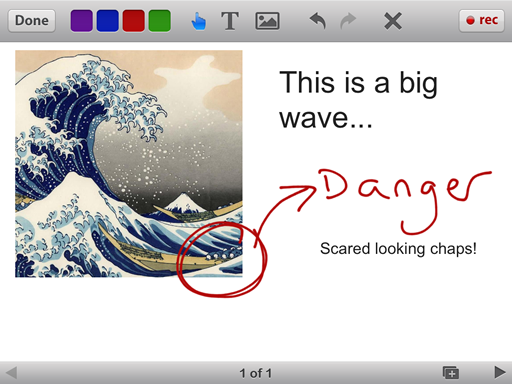
You can type in text onto the slide. This text can be adjusted in terms of size and colour but not font. Once text has been entered, it is editable – you can change the text, move it around the slide and adjust its properties.
Images can be imported from a number of sources: take a photo with the camera, add a picture from those stored on your iPad, import from DropBox or search the web for an image. As with the previous apps, there are no options for web searching. Once an image has been selected, it can be rotated at set 90 degree angles, resized through pinching or selecting to resize the image to fit width and height of the slide. An interesting feature is the ability to lock images so there’s no chance of accidentally moving them.
Drawings will always appear on top of everything. Everything else (text and images) appear in the order in which they were added – the last thing added will appear on top.
Recording is straightforward. Press the “Rec” button and recording starts instantly. A timer lets you know how long you have talked for. There is the option to pause your recording so you can add new elements, move to a new slide and so on.
As mentioned previously, Educreations works on a slide by slide basis. You can create new slides from scratch or you can duplicate existing slides. This allows you to build up your presentation before delivery and then move through the slides when recording.
Once finished, you are asked if you want to save your lesson or start again. If there is no recording done, the app assumes you want to start again when you press the Done button. Selecting the save option lets you put in a title of the recording and a description of what it is the presentation is about. You are then asked about permissions to view the presentation. Once done, your presentation is saved. From here, depending on the permissions you selected you can post the presentation to Facebook or Twitter if required. Alternatively you can email the link of the video to your students/colleagues or get a copy of the video link. The link takes you to the Educreations website where it can be played either windowed or full screen. I couldn’t see any way of getting a copy of the presentation off the website.
Screen Capture
A very basic screen recording app. Once you start the recording, there’s no pause button. You cannot import any images from other sources. You can change the background colour to a spectrum of different options. You can also change the pen colour and thickness.
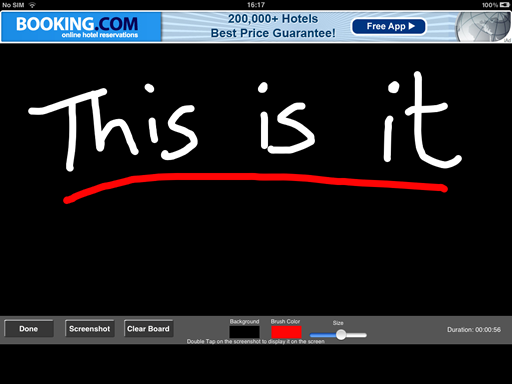
The lack of pause is a serious omission as you have to work on the fly all the time. If you are prepared to register, you can get a download link of whatever it is you recorded which allows you to save the movie as a QuickTime movie (MOV extension) so you could always edit the movie at a later stage. This is perhaps the only advantage of this free app.
PageSend
PageSend allows you to create a multiple page presentation. Images can be imported into your presentation from any image stored on your iPad, a library of images (that only seems to include a grid line image), using the camera (it only allows the rear-facing camera) and from the clipboard if you’ve taken a recent screen shot. Text can be added, using a wide range of colours. A nice addition is the ability to be able to change the font type and size to anything that is stored on your iPad. You can also make your text bold, italic, and adjust the alignment in the text box.
Drawing options allows many different colours to be chosen and the pen can be adjusted to suit your needs precisely. In addition to the pen tool, there is also a highlighting pen to put emphasis on certain elements on the slide. Again, there are only four colours to choose from. There is also the facility to be able to point out aspects on a slide without leaving a mark. This could be very handy when recording as it would not leave your beautifully presented slide covered in lines!
PageSend also allows you to upload documents to their repository. This therefore requires you to sign up to use the product. Allowed formats include most Office formats (Word, Excel, PowerPoint and PDFs). It’s worth noting that even though you can upload a .DOCX file, you can only actually use .DOC files. The same goes for Excel and PowerPoint. Therefore, if you wish to use these files, remember to save them as earlier versions of Office – that is, without the X in the file extension.
When any element has been added to the slide, they can be adjusted. You can adjust the size by pinching either in or out. You can crop the image using the blue guide boxes that appear when an object is selected. You can also rotate the object using the rotate icon. As mentioned previously, objects can be layered so you can move an object in front of or behind over objects just like you would in PowerPoint.
Recording is done using the simple Record icon. A recording can be paused and then resumed. Unlike other apps reviewed there is the option to edit your recording. You can re-record your voice over selected parts of your presentation or remove the sound from a selected area. Just how easy this would be for a final product I couldn’t say. I personally prefer to try and get my recording done in one take leaving in any slight mistakes. However, the ability to edit a presentation to remove some small mistakes makes it more powerful than other apps.
Once finished, there are numerous options as to how to disseminate your presentation. A link to the presentation can be emailed directly to people or shared via Facebook and/or Twitter. If this is your preferred route, you will either need to get other people to have an account or make the presentation public. A nice feature is that the presentation can be saved as a movie (MP4 format) onto your iPad. This could then be uploaded to DropBox or wherever you prefer to keep your videos. This negates having to share the presentation publicly. Another extra feature is the ability to save your presentation as a PDF or as images.
LivePaper
LivePaper doesn’t feature the nicest of interfaces compared to some of the previous apps discussed. When you create a presentation (or Notebook as they call it) you are asked to give it a name, select whether or not you want grid lines and choose the background colour. Once done, you then have to select the Notebook rather than being taken directly to it. Not a big deal, I know, but it’s these little design flaws that make this app less appealing.
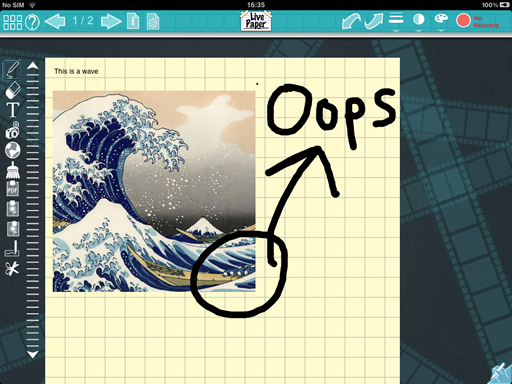
Some nice touches include a “wrist guard” for those of us who tend to lean on the screen when writing. An undo and redo is included and there is also a zoom feature allowing you to get a close up of some particular aspect. For drawing, the ability to select from the whole spectrum of colours as well as the ability to change the transparency of the pen is a nice feature. There is also a large degree of flexibility in the pen thickness. Images can be imported from whatever you have stored on your iPad, as well as being able to take photos from the rear facing camera.
Despite these nice touches, the overall design is not intuitive. I found trying to use the scissors to select an object area to move it somewhere else very tricky to use. The recording option was also very limited. You pressed record, and as soon as you finished, it was automatically saved to your iPad. In itself, not a bad idea – this allows you to then edit the finished video. However, the inability to pause a recording means you would then potentially have to stitch together multiple videos that you have created.
I found myself wanting to use this product but giving up due to the clunky interface. It also would appear that some of the features have yet to be developed – such as the ability to include either a live web page or a snapshot of a web page. This might be a product to watch out for in the future, but so far I would personally avoid this one for the time being.
I also like Speashtop Whietboard for Android (being an Android myself). It’s described at:
http://www.splashtop.com/press/splashtop-launches-whiteboard-for-android-the-only-interactive-whiteboard-app-for-android-tablets
It claims that it works with classroom whiteboards, including the Promethean ones we have here, but I haven’t tried that.