
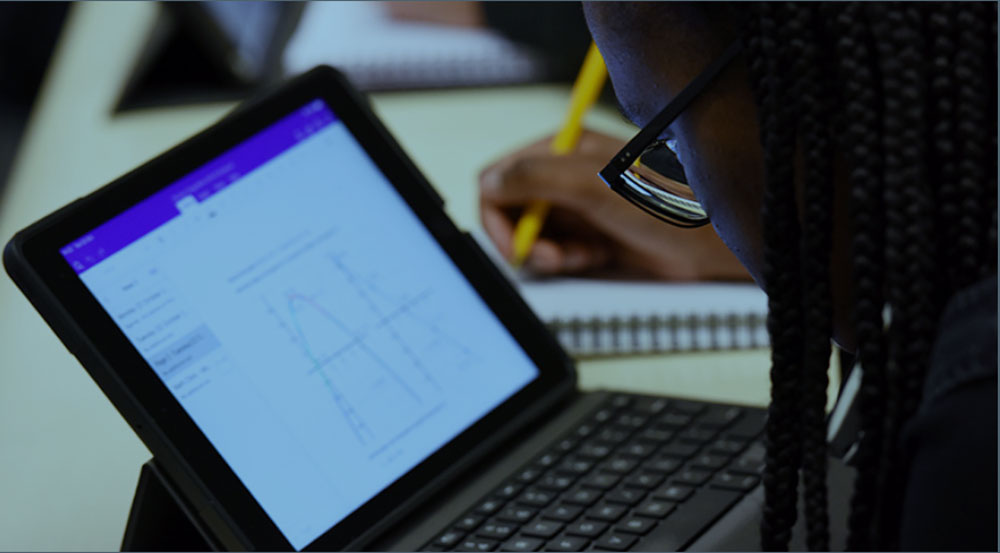
One of the many perks of being a student at Teesside University is that you may be eligible for a free iPad with a fantastic toolkit of apps to aid your studies through the advance scheme. And while these devices are already invaluable to students, there are several lesser-known features that could help you achieve even more with yours; here are just five.
1. Focus
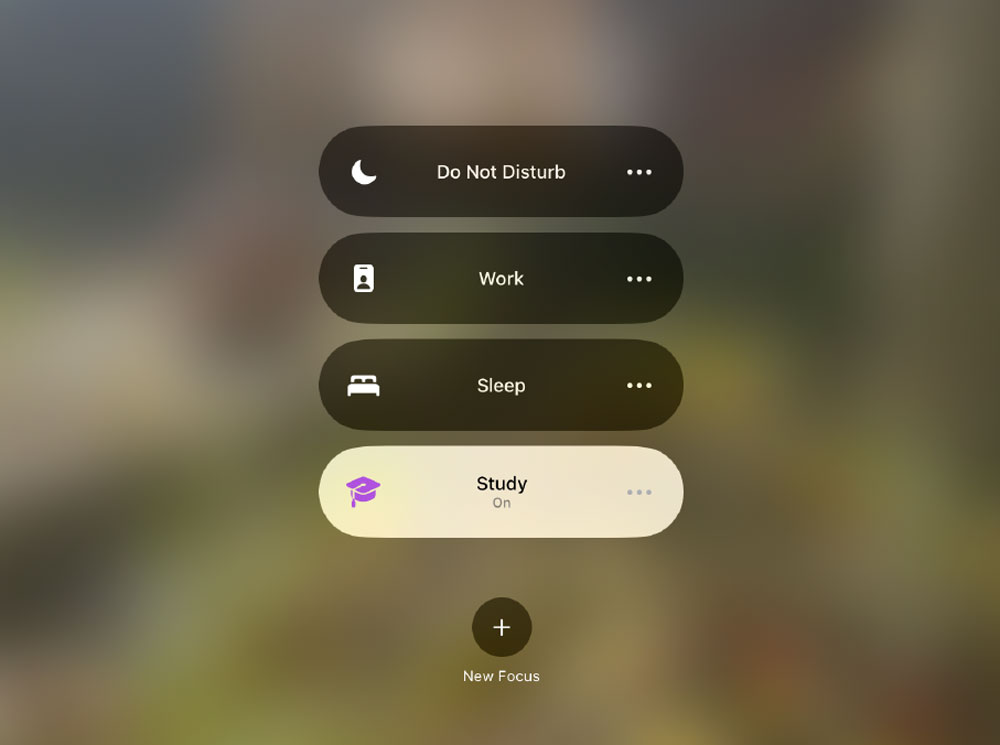
Most of us already know about the ‘Do Not Disturb’ feature on our phones, but ‘Focus’ takes it a step further. Focus modes enable your iPad to automatically silence notifications if it detects you are in a situation that requires no distractions, whether that is at a specific location (like a lecture building), a specific time (your private study hours), or when you open a specific app (like Teams).
Setup
– Go to Settings > Focus > Do Not Disturb.
– Scroll down to ‘Add Schedule’. Here, you can choose what situations you want your iPad to silence notifications in.
– You can customise the Focus feature to your liking, by choosing what apps you would like to receive notifications from (if any), or even make a custom Home Screen that only shows you work-related apps when the Focus is on.
If you own another Apple device, like an iPhone or Mac, turning on a Focus on one of them will synchronise the feature across the rest of your devices, so you do not need to go through the setup process again on each individual device.
2. Background sounds
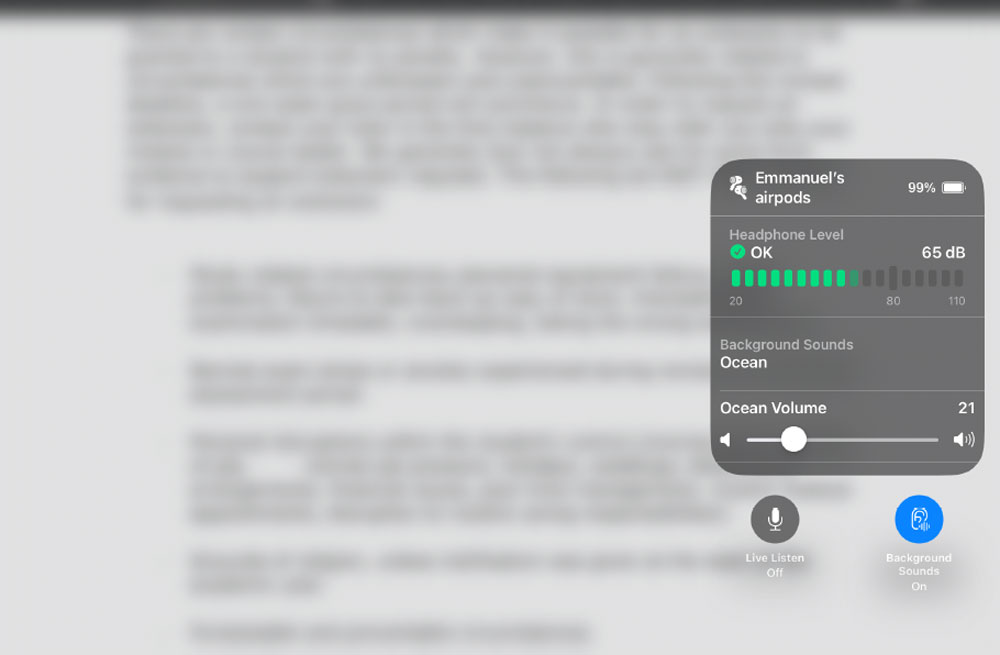
Trying to work from home but your flatmates are being loud? With Background Sounds, simply put on a pair of headphones and use a soothing ambient track, like rainfall, or ocean waves, to tune out all the noise.
Setup
– Go to Settings > Control Centre > More Controls > Hearing.
– Tap on the plus button next to it.
– Swipe down from the top right corner of the screen and open Control Centre. You should now see an icon of an ear somewhere toward the bottom.
– Open it and turn Background Sounds on. A second tap will show you what sounds are available.
– You can also play these while listening to music for a more calming experience.
Note that you do not need headphones for this, they can be played aloud from your iPad as well.
3. Multi-tasking
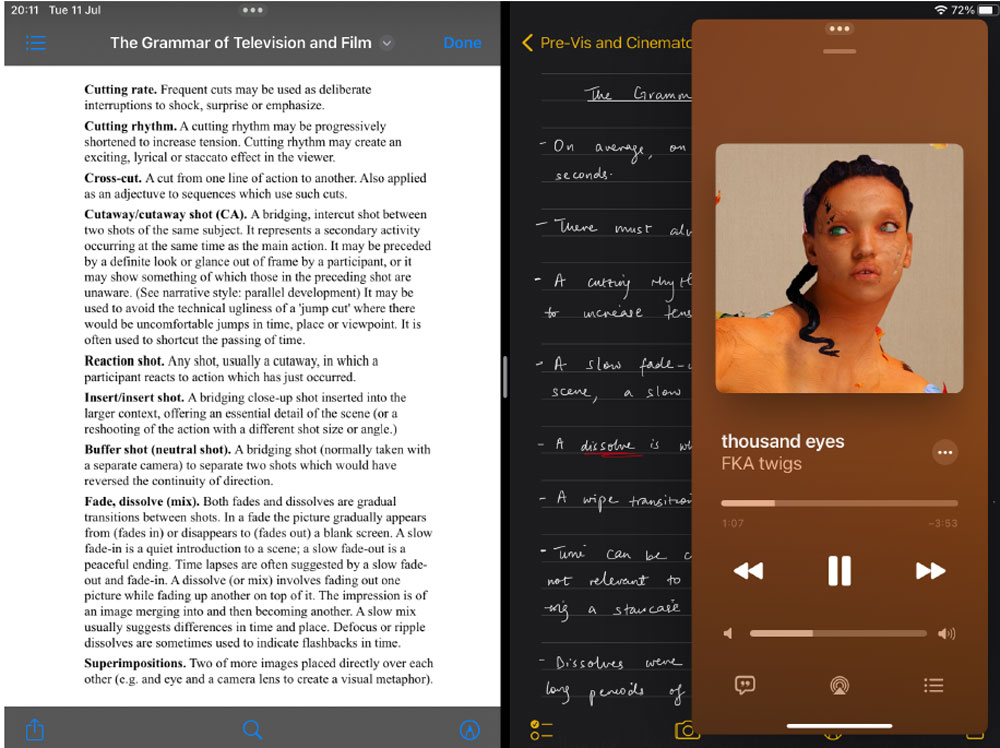
Multitasking lets you use different apps at once to streamline your workflow.
Setup
– Open one of the apps you would like to use.
– Click on the three dots at the top of the screen and select ‘Split View’.
– Select a second app you would like to multitask with, which will open on the right-hand side of the screen.
– If needed, move the small vertical bar between them to adjust the size of either app.
You can also multitask through ‘Slide Over’, which you may have noticed from the three-dot menu earlier. Repeat the same process as before, but this time, select ‘Slide Over’ instead of ‘Split View’.
The wonderful thing about ‘Slide Over’, is that you can add multiple apps to it and rapidly switch between them in a carousel-like manner.
– To do this, gently slide your finger upwards from the bottom of the screen, to reveal a small taskbar of apps. This is called the ‘Dock’.
– Touch and hold on one of the apps and drag them onto the app using ‘Slide Over’.
– Swipe left or right on the horizontal bar at the bottom, to switch between apps.
– You can also temporarily hide ‘Slide Over’ by simply swiping it off-screen.
4. Scan Documents
Save yourself the hassle of using a printer by scanning a document right from your iPad. No need to download any third-party apps either, it is a native software feature.
Setup
– Open the Files app and select the three dots in the top left of the screen. If you cannot see it, click on the Sidebar (the blue square in the top left) to reveal it.
– Choose ‘Scan Documents’, and it will open a camera where you can place the document in view.
– The iPad automatically detects the document and takes a picture, cropping out the rest of its surroundings – make sure the setting is on Auto for this to happen.
– You can then go in and edit the corners, rotate the document, or add a filter if needed.
5. External Display
You can also turn your iPad into a second monitor, if you require more screen space. But what makes it extra special is that you get the benefit of the Apple pencil as well, meaning you can draw on desktop apps like Photoshop, right on your iPad.
For Mac users running macOs Catalina or later, the feature is built-in with an option called Sidecar, and it can even work wirelessly. Just make sure both devices are signed in to the same Apple ID.
If you are a Windows user, or you own an older Mac, you will need to use a third party app. Free to download options include SpaceDesk and Splashtop Wired XDisplay, but if you are not satisfied with those, then check out paid equivalents AstroPad or DuetDisplay, which are both subscription-based.

– By Emmanuel