
Captioning video creates accessible content for individuals who have a hearing impairment. Captions are also useful for anyone working in a noisy environment who doesn’t have headphones. They can add another dimension to video content, thus helping to fully engage students.
Types of Captioning
It is useful to be aware of the different types of captioning:
Closed Captions: Denoted with the familiar CC icon ![]() . Closed captions are optional, so users can turn them on or off with video player controls.
. Closed captions are optional, so users can turn them on or off with video player controls.
Open Captions: Are always displayed as they are part of the video stream, so users cannot turn them off. Open captions can be distracting to some users and the quality / readability of the captions can be affected by compression of the video.
Audio Description: Providing a written audio description can help to improve the accessibility of audio and video content. The description should include sound effects such as “floor creaking” or “door slamming” to provide a richer experience for users.
Real-Time Captions: Real-time captioning occurs during live events such as on-line video streams. A transcription service is required for real-time captioning and needs to be set-up beforehand.
Subtitles: Translate just spoken dialogue and do not include sound effects or other descriptions of the audio.
Adding Captions to Videos
So, how do you add captions to your videos?
One method is to add the captions in your video editing software package. The captioning methods available will depend on the package you’re using and the feature set it offers. Windows Movie Maker (free with Windows), for example, allows you to add a single “subtitle” to video clips using the “Title and Credits” feature, whereas a professional video editing package such as Adobe Premiere Pro offers a full set of closed caption features.
Another option is to use YouTube’s automatic captioning service. It’s not 100% perfect, but it can serve as a base for captioning any videos that you own and will remove the need for you to type all of the captions from scratch. Plus, the clearer your speaking voice and diction, the better results you’ll get.
The main advantage of using the captioning service is that the time codes of the captions are synchronised to your video content.
Before starting out, it might be a good idea to create a storyboard which outlines the video and includes your narration. This will help to create your captions as you will have already written the text.
To use YouTube’s captioning service:
1. Create your video, then upload it to YouTube and wait two to six hours.
2. Log back into YouTube and click Video Manager.
3. Locate your video and click Edit.
4. Click Subtitles and CC. You will be asked to select the video language. Then click the button which reads Automatic.
The green dot indicates that automatic captions have been generated in this language.
![]()
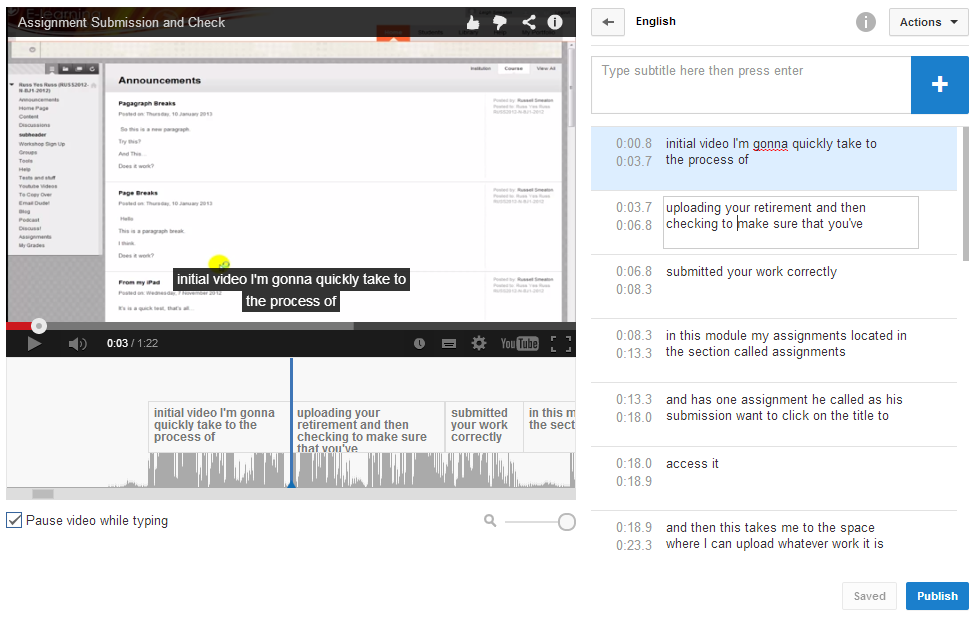
5. The captions will appear alongside the video. Go through your video, read the captions and edit them where necessary to correct any mistakes. Click Publish when you have finished.
The Record from Webcam feature in Blackboard’s text editor allows you to record videos directly from your webcam and upload them straight to YouTube. These videos can then be embedded in your Blackboard module. The advantage of using this feature to record your videos is that you can benefit from YouTube’s captioning service to add captions to your video. After recording your video, you have a few options for adding captions:
- Type in your video transcript and let YouTube sync it to your video (remember to check the result to make sure the transcript is synchronised correctly).
- Upload a timed caption file – see YouTube’s help page on caption files for more information.
- Wait a few hours after creating the video and use the automatic captions feature, as described further above.
For further information about YouTube’s captioning service, take a look at their help pages.
Lastly, there are a few on-line captioning services which can take a YouTube video (some also take videos from other sources, such as Vimeo), add captions to it and store it on a separate server so viewers can see both the video and the captions. SubTitle Horse, CaptionTube and Amara all offer captioning services.
Ultimately, whichever method you choose, adding captions or providing audio descriptions for your videos vastly improves content accessibility and can also help to provide a richer learning experience for students.